Running Mac OS X inside a QEMU Virtual Machine inside macOS
Macs a plenty.
QEMU, for the uninitiated, is an open-source emulator that does hardware virtualization. Meaning that you can run a different CPU architecture from the host machine’s. I’ll be using QEMU on a host running macOS 10.15 “Catalina” to run older versions of Mac OS X.
In this case, I’m trying to emulate PowerPC on an Intel x86 CPU. Although the emulation would be rather limited. Graphics acceleration and sound are not yet supported, so things like games are a no-go for the time being.
By the way, THIS IS NOT MEANT TO BE A COMPREHENSIVE GUIDE, so I’ll have to address a few important questions:
Where did I get old Mac OS X ISOs? From the Internet, using the ancient techniques of Google-fu.
Does it work well? No. It does not work at native speeds nor it has much support for graphics acceleration, so you can throw out playing old Classic Mac games that need QE/CI on a virtual machine.
Why am I doing this? Why, for the lulz science and to broaden my horizons in the field of computer virtualization, of course!
Now that we’ve got these existential questions out of the way, I’ll start by outlining what’s needed to get an old Mac OS X version up and running on top of Catalina:
Homebrew. It goes without saying that Homebrew is a great tool, and any developer who prefers/is stuck with macOS should have it. MacPorts isn’t a bad alternative for the FreeBSD veterans.
QEMU. The easiest way to install it is by running the following on terminal:
% brew install qemuA Mac OS X install CD/DVD ISO. I’m using Mac OS X Tiger 10.4 for this post.
Pouring QEMU in the terminal, and a cold one in a pint glass, let’s begin setting up this VM. Firstly, we’ll check if we have all QEMU dependencies installed. Homebrew would normally install dependencies automatically if needed, but it doesn’t hurt to check if we have those installed:
% brew install libffi gettext glib pkg-config autoconf automake pixman
With all our ducks in a row, let’s create a folder that will hold all the files that make up the virtual machine, then copy the downloaded Tiger installation ISO there.
    % mkdir ~/VMs/Tiger
    % cd ~/VMs/Tiger
    % mv ~/Downloads/Tiger.iso Tiger.iso
And let’s make an empty hard drive image. I’ll be using 20 GB for this installation, but Mac OS X Tiger can thrive off much smaller space, like 8 GB or so but I got loads of space and a mood for a bit of experimenting.
% qemu-img create -f raw Tiger.img 20G
You’ll get a message that looks something like “Formatting 'Tiger.img', fmt=raw size=21474836480”. This means your hard drive image has now been created. Now we can create a script to run the actual virtual machine. Run nano or any of your favorite text editors and paste the following text block:
    #! /bin/bash
    cd "$(dirname "$0")"

    qemu-system-ppc -cpu g4 -L pc-bios -boot d -M mac99,via=pmu -m 3072 -g 1440x900x32 \
    -prom-env 'auto-boot?=true' -prom-env 'boot-args=-v' -prom-env 'vga-ndrv?=true' \
    -drive file=Tiger.iso,format=raw,media=cdrom \
    -drive file=Tiger.img,format=raw,media=disk \
    -netdev user,id=network01 -device sungem,netdev=network01 \
    -audiodev id=coreaudio,driver=coreaudio \
    -device VGA,edid=on \
    -device usb-kbd -device usb-mouse -device usb-tablet
Let’s go over this little block. Starting with the line that begins with “qemu-system-ppc…” (we’ll call it line 1 for convenience), we’re setting the architecture to PowerPC, the CPU is a PowerPC G4 and “-boot d” means we’re booting off the CD-ROM first. “ -M mac99,via=pmu” means that the virtual machine is a Power Mac with pmu power management, providing USB mouse and keyboard support.
We’ve allocated 3072 megabytes (3 GB) of RAM, which is really overkill; 512 MB is enough and 1 GB is plenty. Anything above 4096 MB will obviously cause the VM to not boot. The resolution is 1440x900 with 32-bit color. This can be left out or changed as long as the aspect ratio is 16:10. I got weird artifacting when using 16:9 resolutions.
The second line means that we’re setting auto-boot to true at the OpenBIOS prompt (‘auto-boot?=true’), enabling verbose boot for Mac OS X (‘boot-args=-v’) and enabling on-the-fly resolution changes (‘vga-ndrv?=true’). Those are all optional but convenient to have.
For the third line through the 7th, we’re setting the CD-ROM image, the HDD image, network, audio and enabling EDID detection for additional resolutions support.
Save as qemu_tiger.command, then run the following command to make it executable.
% chmod +x ./qemu_tiger.command
Now you can run the file by double-clicking on it or calling it from terminal. You’ll be greeted by a yellow-beige window containing OpenBIOS, and then the gray Apple boot screen will pop up…

“Houston, we have liftoff.”
… which (if you have verbose boot enabled) will quickly be replaced by this scrolling monstrosity that is the scourge of everyone who has ever tried their hand at Hackintosh:

Flashbacks of indecipherable errors and frustration. *shivers*
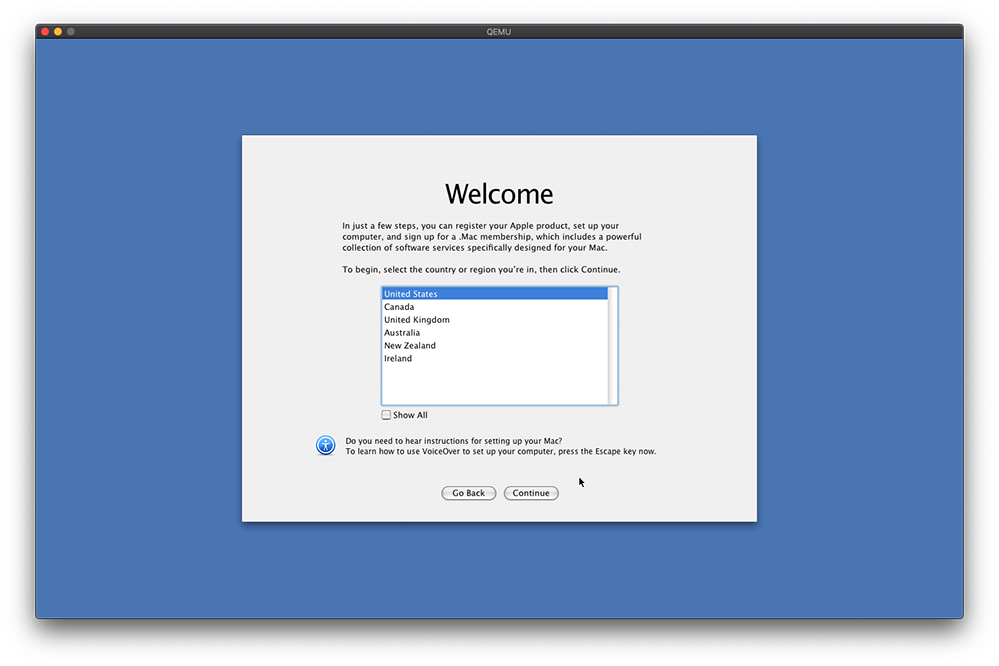
If everything has gone according to plan and our config is oll-korrect, we should soon find ourselves staring at the language selection screen of Mac OS X’s Installer that we all know and love.

iTower of Babel
Install Mac OS X as you would do on a regular Mac: Choose your language and click the arrow button, then from the top bar, choose Utilities → Disk Utility. On the left pane, you’ll see your hard drive image as “XX.0 GB QEMU HARDDISK” (XX would be the size of the image we’ve allocated earlier). On the right, click “Erase” then select the Volume Format as “Mac OS Extended (Journaled)” and name the drive whatever you like. I’ll be calling it Macintosh HD. Hit ⌘+Q to quit Disk Utility after it has formatted the drive.
Back in the installer, click Continue → Continue → Agree → Continue (after checking we’re installing into the hard drive), then click Customize. Depending on your use case, you may wish to add/remove a particular component. There aren’t many to choose from though. Afterwards, click Install and lean back for a few minutes.

Come to think about it, this is miles ahead of what Windows XP used to look like when it was installing.
Reboot and quit QEMU. Remember that we have set the VM to boot from the CD, so we’ll have to make a small adjustment to our qemu_tiger.command file. Namely changing “-boot d” to “-boot c” in order to make it boot off the hard drive instead.

Subtle change. You can also disable verbose boot by removing -prom-env ‘boot-args=-v’
Re-run the same chmod command above and run the command file. QEMU will boot up the VM from the hard disk. Wait a few moments and you should see the Setup Assistant for Tiger
Not getting the Mac OS X intro video (due to QE/CI not being supported) was almost heartbreaking.
Setup, register, connect to the internet and install your favorite old apps. You’re all set and ready to go.

Ah, this brings back fond memories.
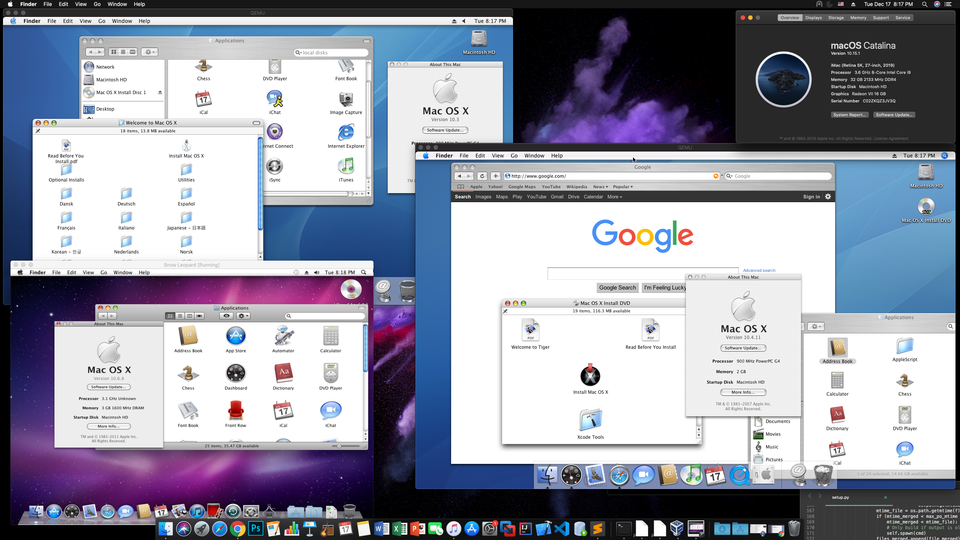
Pretty much the same trick works on all PowerPC-based Mac OS versions, starting from Mac OS 9. Here are three VMs set up the same way running Mac OS 9, Mac OS X 10.3 Panther and our Tiger VM:
